🦊 Morphin Magic
#89 — Animating a fox 🦊 turning into an elephant 🐘
Hey friends,
I’ve been having fun making morphing animations using Procreate on my iPad, and I want to share some behind-the-scenes progress with you today.
Morphing animations are exactly what they sound like—animations in which something morphs into something else. You see this technique in animated films, but also in software. One of the most common examples is in web sites, where you see a “hamburger” icon to open a menu morph into the “X” icon to close the menu:

Usually there’s a core object in focus, and it transitions seamlessly from one state to another as if it were a Transformer robot. The morphing effect creates an illusion both the start and final objects are made of the same “stuff.”
I’ve implemented a few of these effects in software animations in the past. Some examples can be found in a talk I gave years ago, A Brief Tour of Animation. In the talk, I go over the classic Disney animation principles, and how they can be applied when building software interfaces. Animation, when done right, is a powerful tool to elevate the delight and responsive feel of software interfaces.
I’ve always wanted to try hand-drawing a morphing animation, and finally got around to trying it with the help of a new Skillshare course by Giulia Martinelli called Morphing Loops. Giulia is an incredibly talented artist, animator and director. I first encountered her work through her spectacular short film, Merlot. I loved its touching story, the stylish and appealing animation, and the sound effects which elevate every scene.
When I saw that Giulia has a Patreon, I immediately became a supporter. I’ve been a patron of her work ever since, and I’m proud to have supported her efforts on creating her next short film, Marea, which is now making the rounds in film festivals! It feels good to invest in the work of creators I admire, and know that I had a small hand in helping their visions come to life.
With all that said, let’s into get into some morphin!
Idea
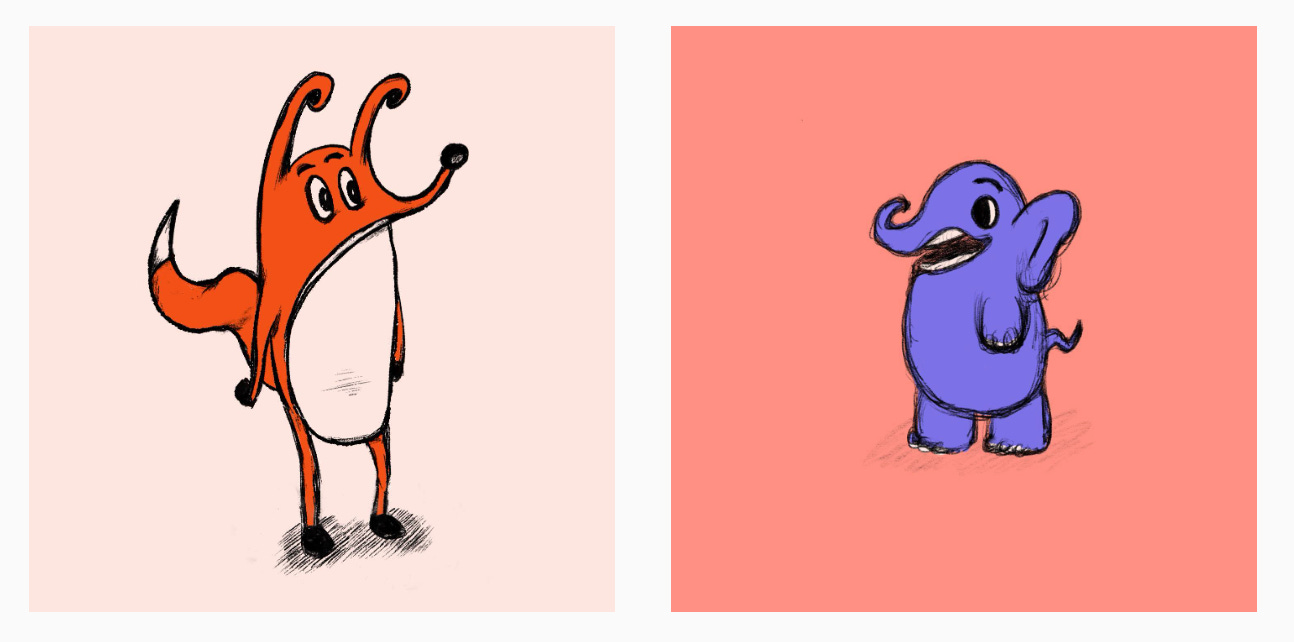
The first step is plan the animation. When I saw Giulia’s example animation, I’ll admit I was quite intimidated at first. But then she broke it down into steps, and I could see how each stage could be implemented progressively. For my project, I wanted to animate two of my characters: Elly the elephant, and our friendly neighborhood Quick Brown Fox:
One of the keys Giulia emphasizes is to try and animate between two things that are roughly similar in size. So, I figured I could just focus on their heads, and try to draw them roughly the same size. Luckily, they both have long curvy noses, which will help keep the overall shape pretty consistent.
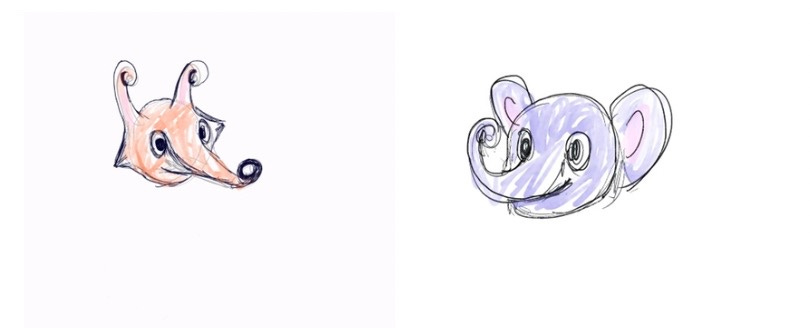
To begin with, I did a rough sketch of both heads. I tried my best to keep the lines as simple as possible. At the early stages of animating, it’s not worth it to worry about the details. With some rough lines in place, I did a little rough coloring and tried to make the heads look like “mirrors” of each other.
It’s a start!
Key Poses
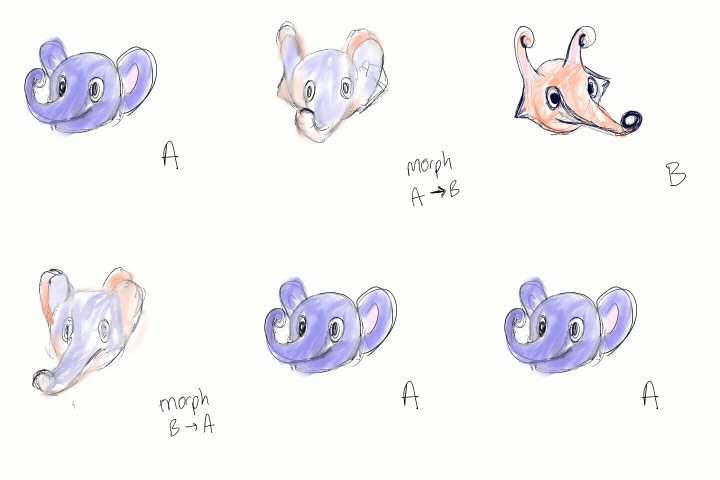
With a rough idea in mind, the next step is to figure out a few key poses. Besides the start and end states, you want a key pose in the middle that serves as a guide for the animation. I put the three states (“A” start, “B” end, “M” middle) into separate layers in Procreate. I used Procreate Animation Assist’s “hold” feature to make the frames linger, so I can preview how the final animation might look:
It’s alive! I’m always surprised at how an animation comes to life even with just a few drawings. You get a sense for it, and your imagination starts to fill in the gaps.
Note: I’m animating from A → M → B, and then back the other way, from B → M → A. Technically, I could just do a reverse effect (like an Instagram Boomerang), but that is not the effect I’m going after. I want each direction to be a slightly different animation, and I’m willing to do the extra work (specifically, it doubles the number of frames needed) to make it happen.
Easing
When designing the speed and movement of an animation, a good convention to follow in general is to animate it with an “ease in ease out” curve. Unlike in a linear curve (where everything moves robotically at the same speed throughout), ease-in-and-out means the animation will start slow, speed up in the middle, then slow down as it reaches the end. This example from Figma illustrates the ease-in-and-out movement of a ball, corresponding to the curve.
Here’s an example of what it would look like if all the drawings were laid out, and if the ball was going left and right instead of up and down:

Okay, that’s a very pretty curve and all, but how the hell do I draw things in Procreate to make it speed up and slow down like that?
Thankfully, the answer is fairly simple: The more drawings of a given “state,” the longer it lasts (and the slower it goes) in the resulting animation. So if I want the ball to be slow at the top, I’ll have to draw more drawings of the ball at the top. This will cause that state to take up more frames, so the animation “spends more time” in them.
Given a starting point A and an end point B, you’re basically doing this:
Draw the middle between A and B. Let’s call that M.
Draw the middle between A and M (let’s call it M1), and another middle between M and B (let’s call it M2).
Draw the middle between A and M1, and M2 and B.
etc.
This short video from @plainlysimplestudios does a great job of explaining the technique. (I’m glossing over the concepts here a bit, but if you want to get deeper into it, be sure to check out Giulia’s class. It gives a great walkthrough of the whole process.)
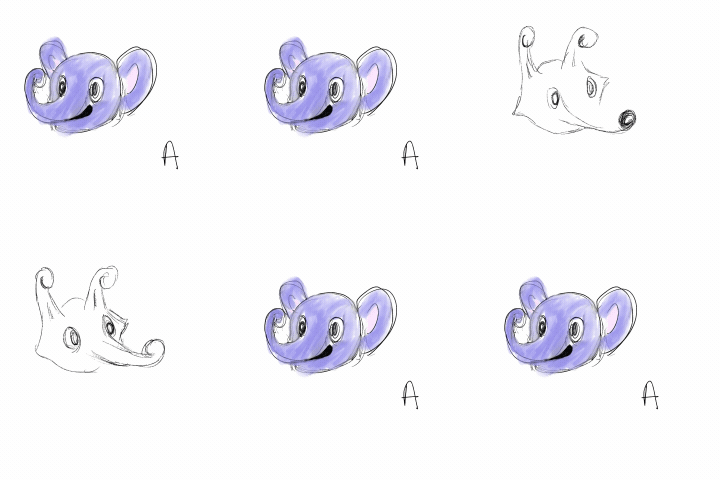
After an hour or two toying around, here’s what I got:
Sweet! I love how it’s looking so far 😀 I really like the “stretching out” of the nose from elephant to fox, and the "lift" from fox back to elephant.
I could leave it as is and call it “done” as a learning experiment, but I want to take it a bit further.
Next Steps
Before I share my ideas of what’s next, here’s a little prompt for you: How would you finish the animation? Close your eyes and imagine what else might happen in between the two states. What do you see?
Here’s what I plan to do: I want to add some anticipation before each transition. Anticipation is an animation technique where something happens as a “pre-action”—to hint at what is about to come. (I go over it alongside a few other animation principles in my talk on animation.)
For the elephant, I want them to lift their head a bit as if they’re about to sneeze, and as they come down, their nose bursts out like a birthday whistle (a.k.a. party horn.) For the fox, I imagined that his nose snaps down abruptly, kinda like those old wrist slap bracelets everyone wrote back in my middle school days.
Beyond that, I would also clean up the line work and coloring, and maybe add a few more pauses and details outside the heads. Once it’s done, this animation could serve as a neat artifact to place on my website, newsletter about page, or in talks I give in the future. I’m looking forward to jumping back in to finish this 😊
If you enjoyed this walkthrough, let me know! It’ll give me a little boost to finish the animation and share the final results here.


Thanks for sharing that Skillshare course! Another one to queue up :)